Overview Guide to LLY Injectors
LLY injectors are a crucial component of the Duramax 6.6L diesel engine, known for their reliability and performance. In this overview guide, we'll explore the main features, compatible vehicle models, engine specifications, and parameters of LLY injectors.
Compatible Vehicle Models:
- LLY injectors are primarily found in Chevrolet and GMC trucks, specifically in the 2004.5 to 2005 model years.
- Compatible vehicle models include:
- Chevrolet Silverado 2500HD and 3500HD
- GMC Sierra 2500HD and 3500HD
- Chevrolet Express 2500 and 3500
- GMC Savana 2500 and 3500
Engine Specifications:
- LLY injectors are designed for the Duramax 6.6L V8 turbo-diesel engine.
- Engine Code: LLY
- Configuration: V8
- Displacement: 6.6 liters (403 cubic inches)
- Horsepower: Approximately 310 hp
- Torque: Approximately 605 lb-ft
Key Features of LLY Injectors:
-
Bosch Design: LLY injectors are typically Bosch-designed injectors, known for their durability and precision.
-
Piezo-electric Technology: Some LLY injectors may feature piezo-electric technology for precise fuel delivery and improved efficiency.
-
Optimized Spray Patterns: LLY injectors are engineered to create optimal fuel spray patterns for efficient combustion and reduced emissions.
-
High-Quality Materials: Constructed with high-grade materials to withstand the demands of diesel engine operation.
Parameters:
-
Part Number: Each injector has a specific part number, ensuring compatibility with the LLY engine.
-
Flow Rate: LLY injectors have a flow rate typically measured in cubic centimeters per minute (cc/min) or pounds per hour (lbs/hr). This flow rate determines how much fuel is delivered to the engine.
-
Connector Type: LLY injectors come with specific connector types, ensuring proper electrical connection to the vehicle's fuel system.
Maintenance and Replacement:
-
Signs of Bad Injectors: Watch for signs such as rough idle, misfires, decreased performance, excessive smoke, and fuel odor.
-
Rebuilding: LLY injectors can be rebuilt by skilled professionals to restore performance and efficiency.
-
Replacement: When replacing LLY injectors, it's crucial to use high-quality aftermarket or OEM replacements to ensure proper fit and function.
Do LLY Duramax Have Injector Cups?
Yes, LLY Duramax engines do have injector cups. Injector cups, also known as injector sleeves or nozzles, are metal sleeves that provide a seal for the injectors and allow fuel to flow into the combustion chamber. These cups play a critical role in the proper functioning of the fuel injection system in the LLY Duramax engine.
Injector cups are designed to withstand high temperatures and pressures associated with the combustion process. They also help prevent fuel leaks and ensure efficient fuel delivery to the engine cylinders. If an injector cup becomes damaged or worn out, it can lead to fuel leaks, improper fuel atomization, and engine performance issues.
When servicing LLY Duramax injectors, it is essential to inspect the injector cups for any signs of wear, cracks, or leaks. If any issues are detected, the injector cups may need to be replaced to ensure the proper functioning of the fuel system and prevent potential engine damage.
Common Signs of LLY Duramax Injector Problems
The LLY Duramax engine, introduced in 2004, is known for its performance and reliability. However, like any engine, it can experience certain common injector problems over time. Here are some common LLY Duramax injector issues:
1. Injector Failure:
- LLY Duramax injectors can fail due to wear and tear over time. Symptoms include rough idling, misfires, reduced power, and poor fuel efficiency. Injector failure can be caused by contaminated fuel, low fuel quality, or simply the natural wear of internal components.
2. Stiction:
- Stiction occurs when the internal components of the injector become sticky or gummed up. This can result in hesitation, rough idling, and a lack of power. Stiction is often caused by low-quality fuel, inadequate maintenance, or extended periods of idling.
3. Fuel Contamination:
- Contaminated fuel can lead to injector problems in the LLY Duramax. Water, dirt, and other contaminants in the fuel can cause injectors to clog, resulting in poor engine performance and potential damage.
4. Injector Cup Leaks:
- Injector cups, as mentioned earlier, can develop leaks over time. Leaking injector cups can cause fuel to enter the engine oil, leading to diluted oil, increased wear on engine components, and potential engine damage.
5. Faulty Injector Control Module (ICM):
- The ICM controls the operation of the injectors in the LLY Duramax. A faulty ICM can cause injector issues such as misfires, poor fuel efficiency, and rough idling. It's essential to diagnose and replace a faulty ICM to ensure proper injector operation.
6. Injector Harness Issues:
- The wiring harness that connects to the injectors can develop problems, leading to intermittent injector operation or failure. Issues with the injector harness can cause misfires, rough idling, and engine hesitation.
7. Clogged or Dirty Injectors:
- Over time, LLY Duramax injectors can become clogged or dirty, affecting fuel flow and combustion. Symptoms include reduced power, rough idling, and poor fuel efficiency. Regular maintenance and using high-quality fuel can help prevent this issue.
8. Injector Balance Rates:
- Injector balance rates refer to the amount of fuel each injector delivers compared to the others. Variations in balance rates can indicate injector problems. High balance rates may indicate a clogged injector, while low balance rates could suggest a leaking injector.
9. Fuel Injector Return Line Leaks:
- The fuel injector return lines can develop leaks, causing fuel to leak out of the system. This can lead to poor engine performance, fuel odor, and potential safety hazards.
Conclusion:
If you notice any of these common LLY Duramax injector problems, it's essential to address them promptly to prevent further engine damage and maintain optimal performance. Regular maintenance, using high-quality fuel, and monitoring injector performance can help prevent many of these issues. If problems persist, it's best to consult with a qualified mechanic for proper diagnosis and repair.
How Long Do LLY Injectors Last
The lifespan of LLY Duramax injectors can vary based on several factors, including driving conditions, maintenance practices, fuel quality, and overall engine health. On average, LLY injectors can last anywhere from 100,000 to 200,000 miles before they may need to be replaced or rebuilt.
However, it's essential to note that the actual lifespan can vary significantly. Some LLY injectors can last well beyond 200,000 miles with proper maintenance and ideal driving conditions. Conversely, factors such as poor fuel quality, heavy towing or hauling, and inadequate maintenance can lead to premature injector wear and failure.
To maximize the longevity of LLY Duramax injectors, it's crucial to follow regular maintenance schedules, use high-quality fuel, change fuel filters at recommended intervals, and address any engine performance issues promptly. Monitoring the performance of the injectors and addressing any signs of trouble can help extend their lifespan and prevent more significant engine problems.
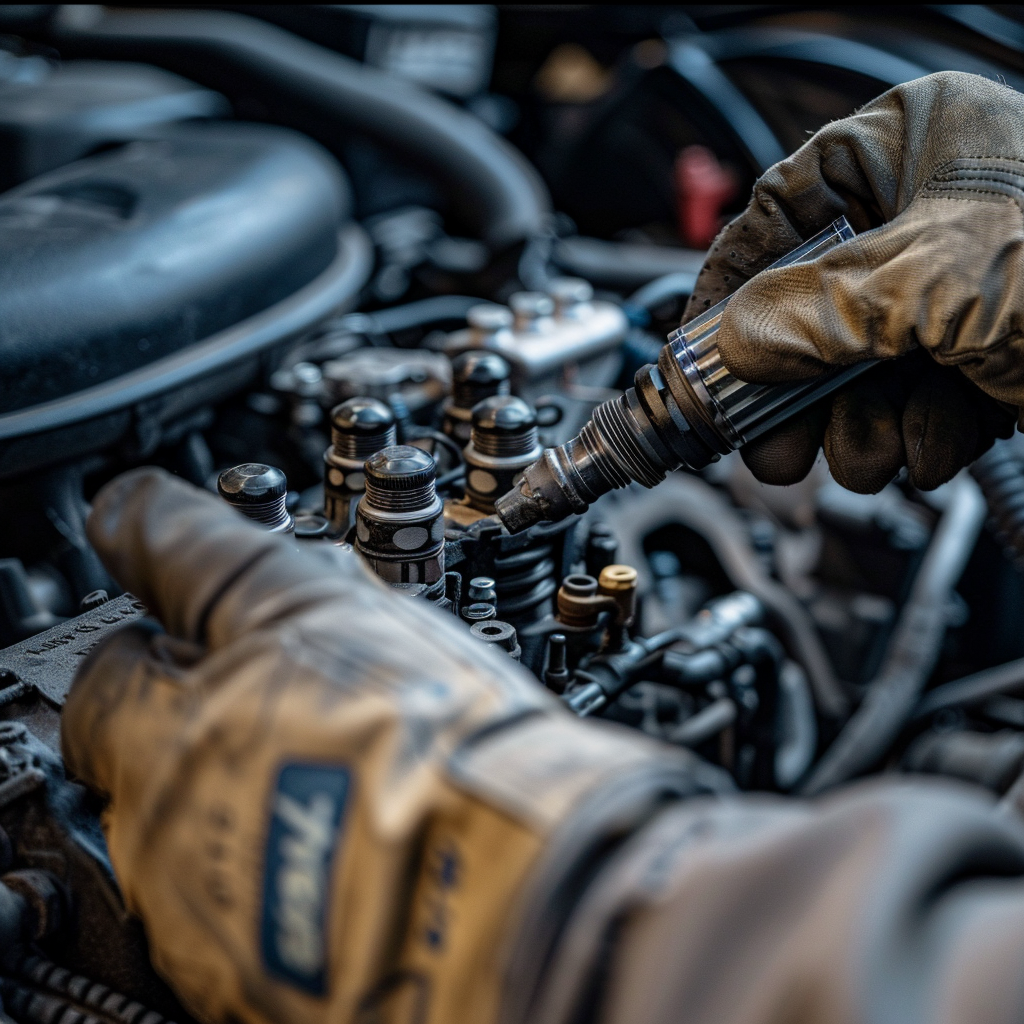
How to Change and Replace Injectors on 6.6 Duramax LLY
Changing injectors on a 6.6 Duramax LLY engine is a complex process that requires mechanical skill and the right tools. Here's a general overview of the steps involved:
Tools and Materials Needed:
- New injectors
- Injector O-rings
- Injector hold-down bolts
- Torque wrench
- Socket set
- Fuel line disconnect tool
- Injector puller tool
- Clean rags
- Safety glasses
- Gloves
- Shop manual or repair guide for your specific vehicle
Procedure:
-
Prepare the Vehicle:
- Park the vehicle on a flat, level surface and engage the parking brake.
- Disconnect the negative terminal of the battery.
- Relieve fuel system pressure by removing the fuel cap and opening the fuel drain valve.
-
Remove the Valve Covers:
- Use a socket set to remove the valve covers on both sides of the engine. This will provide access to the injectors.
-
Disconnect Fuel Lines:
- Use a fuel line disconnect tool to disconnect the fuel lines from each injector. Be careful as pressurized fuel may still be present.
-
Remove Injector Hold-Down Bolts:
- Loosen and remove the injector hold-down bolts using a socket set.
-
Remove Injectors:
- Use an injector puller tool to carefully remove the injectors from the cylinder head. Apply gentle pressure and wiggle the injector to loosen it from the seat.
-
Clean the Injector Ports:
- Before installing the new injectors, clean the injector ports in the cylinder head with a clean rag to remove any debris or residue.
-
Install New Injectors:
- Apply a small amount of clean engine oil to the O-rings on the new injectors.
- Carefully insert the new injectors into the injector ports, making sure they are seated properly.
-
Tighten Injector Hold-Down Bolts:
- Use a torque wrench to tighten the injector hold-down bolts to the manufacturer's specifications.
-
Reconnect Fuel Lines:
- Reconnect the fuel lines to each injector, ensuring they are securely in place.
-
Replace Valve Covers:
- Install the valve covers back onto the engine and tighten the bolts securely.
-
Reconnect Battery:
- Reconnect the negative terminal of the battery.
-
Prime the Fuel System:
- Turn the ignition key to the "ON" position without starting the engine. This will prime the fuel system.
- Check for any fuel leaks around the injectors and fuel lines.
Important Tips:
- Refer to the shop manual or repair guide for your specific vehicle for detailed instructions and torque specifications.
- Use caution when working with fuel. Ensure there are no open flames or sparks nearby.
- It's recommended to replace all injectors at the same time to ensure balanced performance.
- After completing the installation, run a diagnostic scan to check for any fault codes and ensure proper injector operation.
This process should be performed by someone with mechanical experience and the necessary tools. If you're not comfortable doing it yourself, it's best to seek assistance from a qualified mechanic.
How to Ice Pick LLY Injectors
"Ice picking" injectors is a method used to remove LLY Duramax injectors that have become stuck or seized in the cylinder head. Here's a general overview of the ice pick method:
Tools and Materials Needed:
- Ice pick or small pry bar
- Hammer
- Safety glasses
- Gloves
- Penetrating oil (such as WD-40 or PB Blaster)
- Clean rags
Procedure:
-
Prepare the Vehicle:
- Park the vehicle on a flat, level surface and engage the parking brake.
- Disconnect the negative terminal of the battery.
- Relieve fuel system pressure by removing the fuel cap and opening the fuel drain valve.
-
Apply Penetrating Oil:
- Spray penetrating oil around the base of the injector where it meets the cylinder head. Allow the oil to penetrate and loosen any corrosion or buildup.
-
Access the Injector:
- Remove the valve cover(s) on the side of the engine where the stuck injector is located. This will provide access to the injector.
-
Ice Pick Method:
- Insert the ice pick or small pry bar carefully between the injector body and the cylinder head.
- Apply gentle pressure to the ice pick while tapping it lightly with a hammer. The goal is to create a small gap between the injector and the cylinder head.
-
Rotate and Wiggle:
- Once you've created a gap, carefully rotate the ice pick or pry bar to apply pressure from different angles.
- Wiggle the injector back and forth while applying pressure. This motion helps break the injector free from the cylinder head.
-
Continue Tapping and Applying Pressure:
- Tap the ice pick lightly with a hammer while applying steady pressure to the injector.
- Be patient and continue this process until the injector starts to move and becomes loose.
-
Remove the Injector:
- Once the injector is loose, carefully pull it straight out of the cylinder head.
- Use clean rags to wipe away any debris or residue from the injector port.
-
Inspect and Clean:
- Inspect the injector and injector port for any signs of damage or wear.
- Clean the injector port with a clean rag and some penetrating oil to remove any remaining debris.
-
Install New Injector (if applicable):
- If the old injector needs to be replaced, install the new injector into the injector port.
- Apply a small amount of clean engine oil to the O-rings on the new injector before installation.
-
Reassemble:
- Reinstall the valve cover(s) and tighten the bolts securely.
- Reconnect the negative terminal of the battery.
-
Check for Leaks:
- Turn the ignition key to the "ON" position without starting the engine. Check for any fuel leaks around the injector and fuel lines.
-
Final Steps:
- Start the engine and monitor for any unusual noises or issues.
- Run a diagnostic scan to check for any fault codes and ensure proper injector operation.
Important Tips:
- Safety is crucial. Always wear safety glasses and gloves when working with tools.
- Take your time and be patient with the process. Rushing can lead to damage.
- If the injector remains stuck after attempting the ice pick method, it may require professional assistance to avoid causing further damage.
This method should be used as a last resort when other methods, such as using a slide hammer or injector removal tool, have not been successful. If you're unsure or uncomfortable performing this procedure, it's best to seek assistance from a qualified mechanic.
How to Rebuild LLY Injectors
Rebuilding LLY Duramax injectors is a complex process that requires precision and attention to detail. Here's a general overview of the steps involved in rebuilding LLY injectors:
Tools and Materials Needed:
- LLY Duramax injector rebuild kit
- Injector removal tool
- Injector tester
- Clean rags
- Safety glasses
- Gloves
- Penetrating oil
- Small pry bar
- Hammer
- Torque wrench
- Shop manual or repair guide for your specific vehicle
Procedure:
-
Prepare the Vehicle:
- Park the vehicle on a flat, level surface and engage the parking brake.
- Disconnect the negative terminal of the battery.
- Relieve fuel system pressure by removing the fuel cap and opening the fuel drain valve.
-
Remove the Injectors:
- Use an injector removal tool to carefully remove the injectors from the cylinder head.
- Apply penetrating oil around the base of the injectors to help loosen them.
-
Disassemble the Injectors:
- Once the injectors are removed, carefully disassemble them using the instructions provided in the rebuild kit.
- Use a small pry bar and hammer to gently remove the injector components.
-
Inspect the Components:
- Thoroughly inspect each component for signs of wear, damage, or corrosion.
- Clean all components using a suitable solvent and clean rags.
-
Replace O-rings and Seals:
- Replace all O-rings, seals, and gaskets with the new ones provided in the rebuild kit.
- Ensure proper alignment and seating of the new O-rings and seals.
-
Reassemble the Injectors:
- Carefully reassemble the injectors, following the instructions provided in the rebuild kit.
- Use a small amount of clean engine oil to lubricate O-rings and seals during assembly.
-
Test the Injectors:
- Use an injector tester to check the spray pattern and flow rate of each injector.
- Ensure that all injectors meet the manufacturer's specifications for flow and pattern.
-
Install the Rebuilt Injectors:
- Once the injectors pass the testing, carefully install them back into the cylinder head.
- Use a torque wrench to tighten the injector hold-down bolts to the manufacturer's specifications.
-
Reconnect Fuel Lines:
- Reconnect the fuel lines to each injector, ensuring they are securely in place.
-
Replace Valve Covers:
- Install the valve covers back onto the engine and tighten the bolts securely.
-
Reconnect Battery:
- Reconnect the negative terminal of the battery.
-
Prime the Fuel System:
- Turn the ignition key to the "ON" position without starting the engine. This will prime the fuel system.
- Check for any fuel leaks around the injectors and fuel lines.
Important Tips:
- Refer to the shop manual or repair guide for your specific vehicle for detailed instructions and torque specifications.
- Take care when handling injector components, as they are delicate and can be easily damaged.
- Use a clean and organized workspace to prevent contamination of injector components.
- It's recommended to have the injectors professionally tested and calibrated if you're not equipped with an injector tester.
Rebuilding LLY Duramax injectors requires mechanical skill and attention to detail. If you're not comfortable performing this procedure yourself, it's best to seek assistance from a qualified mechanic or diesel injector specialist.
How to Test Injectors on 6.6 Duramax LLY
Testing the injectors on a 6.6 Duramax LLY engine is crucial for diagnosing performance issues and ensuring proper fuel delivery. Here's a guide on how to test the injectors:
Tools and Materials Needed:
- Diagnostic scanner or scan tool
- Fuel pressure gauge
- Digital multimeter
- Noid light set
- Clean rags
- Safety glasses
- Gloves
Procedure:
-
Prepare the Vehicle:
- Park the vehicle on a flat, level surface and engage the parking brake.
- Disconnect the negative terminal of the battery.
-
Perform Initial Inspection:
- Visually inspect the injector harnesses and connectors for any signs of damage or corrosion. Repair or replace as necessary.
-
Check Fuel Pressure:
- Connect a fuel pressure gauge to the fuel rail's test port.
- Turn the ignition key to the "ON" position without starting the engine.
- Check the fuel pressure reading. It should typically be around 8-10 psi at idle and 30-45 psi under load.
- If the fuel pressure is low, it can indicate injector or fuel system issues.
-
Check Injector Wiring:
- Use a digital multimeter to check the injector wiring harness for proper voltage.
- With the key in the "ON" position, test each injector connector for voltage. It should read around 12 volts.
- If there is no voltage, there may be an issue with the injector wiring or the Engine Control Module (ECM).
-
Perform Injector Balance Rate Test:
- Use a diagnostic scanner or scan tool to perform an injector balance rate test.
- Start the engine and allow it to reach operating temperature.
- Access the balance rate test in the scanner menu and monitor the readings for each injector.
- The balance rates should be within +/- 4 at idle and +/- 6 at higher RPMs.
- A significant difference in balance rates between injectors can indicate a problem with a specific injector.
-
Check Injector Pulse with Noid Light:
- Use a noid light set to check injector pulse.
- Disconnect the injector harness connector and connect the noid light to the harness.
- Start the engine and observe the noid light. It should flash indicating the ECM is sending injector pulse signals.
- If the noid light does not flash, there may be an issue with the ECM or injector wiring.
-
Check for Fuel Leakage:
- Inspect each injector for any signs of fuel leakage around the injector body or at the O-rings.
- Fuel leakage can indicate a faulty injector or a damaged O-ring.
Important Tips:
- Always wear safety glasses and gloves when working with fuel and tools.
- Perform these tests in a well-ventilated area away from open flames or sparks.
- If any injectors fail the tests, they may need to be replaced or rebuilt.
- It's recommended to test all injectors, even if only one appears to be faulty, as issues with one injector can affect the entire engine's performance.
Performing these tests can help diagnose injector issues on a 6.6 Duramax LLY engine. If you're unsure or uncomfortable with the testing process, it's best to seek assistance from a qualified mechanic.


