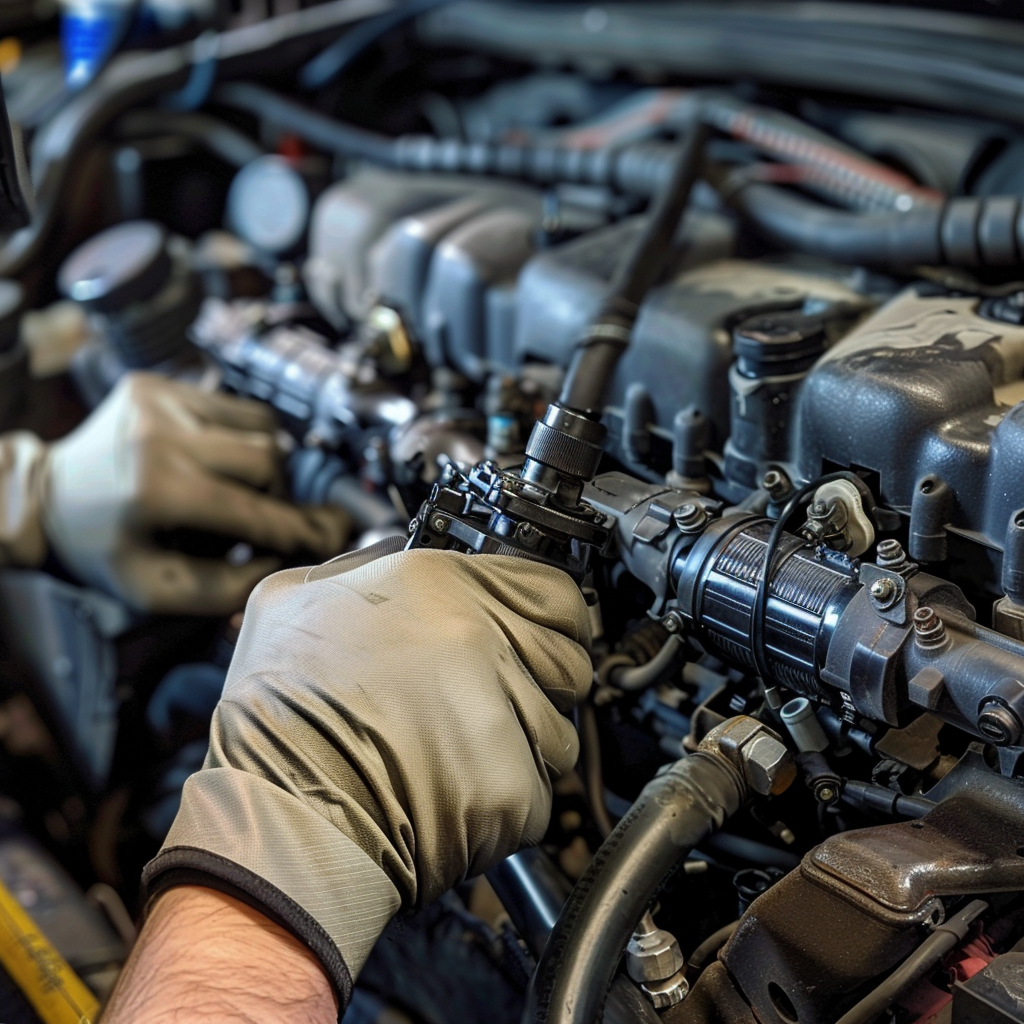
Welcome to our comprehensive guide on 5.9 Cummins injectors! Whether you're a seasoned diesel enthusiast or a new owner of a vehicle powered by the 5.9L Cummins engine, this guide aims to provide you with everything you need to know about these crucial components. From installation to maintenance and troubleshooting, we've got you covered.
Part 1 Overview of 5.9 Cummins Injectors
The 5.9 Cummins engine is a legendary workhorse known for its durability and reliability, particularly in trucks and heavy-duty vehicles. One critical component of the 5.9 Cummins engine is its fuel injectors. These injectors play a crucial role in delivering the precise amount of fuel into the combustion chamber at the right time to ensure efficient engine operation.
Compatible Engine Years
The 5.9 Cummins engine was introduced in 1989 by Cummins, and it has been used in various Dodge Ram trucks, commercial vehicles, and agricultural equipment. The engine underwent several updates and improvements over the years, with the last iteration being the 5.9L Cummins ISB engine used in Dodge Ram trucks up until 2007.
Compatible Truck Models in the US
The 5.9 Cummins engine has been a staple in the Dodge Ram lineup, particularly in the 2500 and 3500 series trucks. Some of the most popular models that have been equipped with the 5.9 Cummins engine include:
- Dodge Ram 2500 (1994-2007)
- Dodge Ram 3500 (1994-2007)
- Dodge Ram 4500/5500 (2008-2009)
- Dodge Ram Chassis Cab (2007-2009)
- Dodge Ram 5.9L Cummins conversions in various applications
Benefits of Upgrading Injectors
Upgrading the injectors in a 5.9 Cummins engine can offer several benefits, including:
- Improved Fuel Efficiency: Upgraded injectors can provide better atomization of fuel, leading to improved fuel efficiency.
- Increased Power and Performance: Larger or more efficient injectors can deliver more fuel, resulting in increased horsepower and torque.
- Better Engine Response: Upgraded injectors can improve throttle response and overall engine performance.
- Enhanced Reliability: New injectors can help ensure proper fuel delivery, reducing the risk of engine damage.
Conclusion
In conclusion, understanding the 5.9 Cummins injectors is crucial for maintaining the performance and reliability of these powerful engines. Compatible with various Dodge Ram trucks and renowned for their durability, upgrading or replacing injectors can provide tangible benefits in terms of fuel efficiency, power, and overall engine performance. Whether for daily driving or heavy-duty work, ensuring the proper functioning of 5.9 Cummins injectors is essential for optimal engine operation.
Part 2 How to Remove Injectors on 5.9 Cummins
Removing injectors on a 5.9 Cummins engine requires careful steps to ensure proper extraction without damaging surrounding components. Here's a general guide on how to remove injectors from a 5.9 Cummins:
-
Prepare the Vehicle: Park the vehicle on a level surface and allow the engine to cool down completely. Disconnect the negative battery terminal to prevent any accidental starts.
-
Gather Necessary Tools: Before starting, gather the tools you'll need. This typically includes a socket set, wrenches, injector puller tool, penetrating oil, and safety gear like gloves and goggles.
-
Access the Injectors: Depending on the vehicle model, you may need to remove components to access the injectors. This can include removing the valve cover, air intake system, and any other components blocking access to the injectors.
-
Disconnect Electrical Connectors: Unplug the electrical connectors from each injector. These connectors are usually located on the top of the injectors and can be removed by pressing the tab and pulling them off.
-
Remove Fuel Lines: Carefully disconnect the fuel lines from each injector. Be cautious as there may be residual fuel pressure. Use a rag to catch any fuel that may spill, and have a container ready to collect fuel from the lines.
-
Remove Injector Hold-Down Bolts: Each injector is held in place by a hold-down bolt or two. Use the appropriate socket and wrench to loosen and remove these bolts. Keep track of which bolts go with which injector as they may vary in length.
-
Use an Injector Puller Tool: With the hold-down bolts removed, you'll need an injector puller tool to remove the injectors from the cylinder head. The puller tool attaches to the injector and provides leverage to pull it out without damaging the injector or the cylinder head.
- Attach the injector puller tool to the injector.
- Slowly turn the handle on the puller tool to apply pressure.
- The injector should start to come out of the cylinder head. Be patient and avoid forcing it.
-
Carefully Extract the Injectors: Once the injector is loose, carefully wiggle and pull it out of the cylinder head. Be gentle to avoid damaging the injector or the injector bore in the cylinder head. It may take some effort to break the seal of the injector o-ring.
-
Inspect the Injector Bore: After removing each injector, inspect the injector bore in the cylinder head. Look for any signs of damage, debris, or wear. Clean the bore with a lint-free cloth and a suitable cleaner if necessary.
-
Label and Keep Track: As you remove each injector, label it and keep track of its position. This will ensure that you reinstall each injector in the correct location.
-
Cover the Injector Ports: Once all injectors are removed, cover the injector ports in the cylinder head with clean rags to prevent debris from entering.
-
Inspect Injectors: Take this opportunity to inspect the removed injectors for any signs of damage, wear, or leaks. If there are issues, they may need to be rebuilt or replaced.
Removing injectors from a 5.9 Cummins engine can be a time-consuming process, and it requires care to prevent damage to the injectors or the engine components. If you're not confident in performing this task yourself, it's recommended to seek the assistance of a qualified mechanic or diesel technician.
Part 3 How to Change/Replace Injectors on a 5.9 Cummins
Replacing injectors on a 5.9 Cummins engine is a task that requires precision and attention to detail. Here is a step-by-step guide on how to change or replace injectors on a 5.9 Cummins engine:
Tools and Materials Needed:
- New injectors
- Injector puller tool
- Socket and wrench set
- Torque wrench
- Clean rags
- Safety glasses
- Gloves
- Gasket sealant
Steps to Replace Injectors:
-
Preparation:
- Park the vehicle on a flat, level surface and disconnect the negative battery terminal.
- Remove the valve cover by loosening the bolts holding it in place.
- Remove the air intake and any components obstructing access to the injectors.
-
Removing the Old Injectors:
- Use the appropriate socket and wrench to remove the high-pressure lines connected to the injectors.
- Disconnect the electrical connectors from each injector.
- Remove the hold-down bolts securing the injectors in place.
- Carefully pull out the old injectors. Be cautious not to damage the injector ports or surrounding components.
-
Installing the New Injectors:
- Apply a small amount of gasket sealant to the o-rings of the new injectors.
- Carefully insert the new injectors into their respective ports, ensuring they are seated properly.
- Reinstall the hold-down bolts and torque them to the manufacturer's specifications.
- Reconnect the electrical connectors to each injector.
- Reattach the high-pressure lines to the injectors, ensuring they are properly tightened.
-
Reassembling:
- Replace the valve cover and torque the bolts to the specified torque value.
- Reinstall any components that were removed to access the injectors, such as the air intake.
- Reconnect the negative battery terminal.
- Start the engine and check for any leaks or abnormal sounds.
- Perform a test drive to ensure proper functionality of the new injectors.
Additional Tips:
- Always consult the vehicle's service manual for specific torque values and procedures.
- Use caution when handling injectors, as they are delicate components.
- It's recommended to replace all injectors at once, even if only one is faulty, to ensure balanced performance.
- If unsure or inexperienced, it's best to seek professional help to avoid damaging the engine.
By following these steps, you can successfully change or replace injectors on a 5.9 Cummins engine. Regular maintenance and timely replacement of injectors can help maintain the engine's performance and longevity.
Part 4 Do 5.9 Cummins Injectors Need to be Programmed?
The 5.9 Cummins injectors are a critical component of the engine's fuel system, responsible for delivering the precise amount of fuel into the combustion chamber. However, unlike some modern engines, the 5.9 Cummins injectors do not require programming when they are replaced. Here's why:
Mechanical Injectors
The 5.9 Cummins engine uses mechanical injectors, which operate based on the engine's mechanical motion rather than electronic signals. These mechanical injectors are driven by the camshaft and are designed to deliver fuel based on the engine's speed and load.
No Programming Needed
Since the 5.9 Cummins injectors are mechanical and not electronic, they do not require any programming when replaced. Unlike newer engines with electronic fuel injection systems, where injector replacement may require programming or calibration to ensure proper fuel delivery, the 5.9 Cummins injectors can be replaced without this additional step.
Replacement Procedure
When replacing injectors on a 5.9 Cummins engine, the procedure typically involves:
-
Removing the Old Injectors: This involves removing the valve cover, disconnecting the injector lines, and then removing the injectors from the cylinder head.
-
Installing the New Injectors: The new injectors are installed in the same manner as the old ones were removed, ensuring proper seating and torque specifications.
-
Testing and Verification: Once the new injectors are installed, it's important to test the engine to ensure proper operation. This can include checking for leaks, verifying fuel pressure, and ensuring smooth engine operation.
Importance of Proper Installation
While the 5.9 Cummins injectors do not require programming, it's crucial to ensure they are installed correctly. Proper installation includes:
- Ensuring the injectors are seated properly and torqued to specifications.
- Properly connecting injector lines and fuel supply.
- Checking for leaks and verifying fuel pressure.
Conclusion
In conclusion, 5.9 Cummins injectors do not need to be programmed when replaced due to their mechanical nature. However, it is essential to follow the proper procedure for injector replacement to ensure optimal engine performance. By understanding the mechanical nature of these injectors and the correct installation process, owners can maintain the reliability and efficiency of their 5.9 Cummins engines.
Part 5 How Many Injectors Are in a 5.9 Cummins?
The 5.9 Cummins engine, depending on the model year, typically has a total of 6 injectors. These injectors are responsible for delivering fuel into the combustion chambers of the engine. Each injector is strategically placed to ensure proper fuel distribution and efficient combustion.
Diagram Showing Injector Locations
Here is a breakdown of the injector locations in a typical 5.9 Cummins engine:
-
Cylinder Banks: The 5.9 Cummins engine has a straight-six cylinder configuration. This means there are two banks of cylinders. Each bank has three cylinders, and each cylinder has its own injector.
-
Injector Placement: The injectors are usually located along the cylinder head, with one injector per cylinder. They are positioned to directly inject fuel into the combustion chamber when needed.
Here is a simplified diagram of the injector locations:

Importance of Each Injector's Function
Each injector in a 5.9 Cummins engine plays a crucial role in the combustion process:
-
Precision Fuel Delivery: The injectors are responsible for precisely metering and delivering the right amount of fuel into each cylinder at the correct time.
-
Engine Performance: Properly functioning injectors ensure optimal engine performance, including power output, fuel efficiency, and emissions control.
-
Smooth Operation: When all injectors are working correctly, the engine runs smoothly without hesitation or misfires.
-
Balance and Even Combustion: Each injector contributes to maintaining balanced fuel distribution across all cylinders, leading to even combustion and reduced engine stress.
Conclusion
In a 5.9 Cummins engine, the six injectors work together to ensure efficient fuel delivery and combustion in each cylinder. Understanding their locations and functions is essential for diagnosing and maintaining the engine's performance. Whether it's for routine maintenance or troubleshooting potential issues, knowing the role of each injector helps ensure the engine operates smoothly and reliably.
Part 6 How Long Do 5.9 Cummins Injectors Last?
The lifespan of 5.9 Cummins injectors can vary depending on several factors, including maintenance practices, fuel quality, driving conditions, and the overall health of the engine. On average, these injectors are designed to last around 100,000 to 150,000 miles under normal operating conditions.
Factors Affecting Injector Lifespan:
-
Maintenance: Regular maintenance, such as timely oil changes and fuel filter replacements, can help extend the life of injectors. Ensuring clean and high-quality fuel is also crucial.
-
Fuel Quality: Poor-quality or contaminated fuel can lead to premature wear and failure of injectors. Using fuel additives and filters can help maintain fuel quality.
-
Driving Conditions: Heavy towing, frequent short trips, or extended idling can put more stress on the injectors and shorten their lifespan.
-
Engine Health: A well-maintained engine with properly functioning components, such as the fuel system and turbocharger, is less likely to put undue stress on the injectors.
Signs of Failing Injectors:
-
Rough Idling: If the engine idles roughly or inconsistently, it could indicate injector issues.
-
Decreased Fuel Efficiency: Injectors that are not functioning properly can lead to poor fuel economy.
-
Engine Misfires: Misfires during acceleration or under load may be a sign of faulty injectors.
-
Smoke from Exhaust: Excessive black smoke from the exhaust could indicate inefficient fuel combustion due to injector problems.
-
Hard Starting or Stalling: Difficulty starting the engine or stalling at idle could be related to injector issues.
Conclusion:
Regular maintenance and paying attention to the signs of failing injectors can help prolong the lifespan of 5.9 Cummins injectors. If you notice any of the symptoms mentioned above, it's essential to have the injectors inspected and replaced if necessary to prevent further damage to the engine.
Part 7 How to Bleed Injectors on a 5.9 Cummins
Bleeding the injectors on a 5.9 Cummins is an important maintenance task, especially after replacing the fuel filter or any components of the fuel system. Bleeding ensures that any air trapped in the fuel lines is removed, allowing the engine to run smoothly. Here's a step-by-step guide on how to bleed the injectors:
Tools and Materials Needed:
- Ratchet and socket set
- Clean rags
- Fuel container
- Assistant (optional)
Steps to Bleed the Injectors:
-
Prepare the Vehicle:
- Park the vehicle on a flat surface and engage the parking brake.
- Turn off the engine and allow it to cool down.
-
Locate the Fuel Filter:
- The fuel filter is typically located on the driver's side of the engine compartment. It may be mounted on the firewall or near the intake manifold.
-
Disconnect the Fuel Filter:
- Use a ratchet and socket to loosen the clamp securing the fuel filter.
- Carefully disconnect the fuel lines from the filter. Be prepared for some fuel spillage.
- Remove the old fuel filter and replace it with a new, clean one. Make sure it is installed correctly.
-
Prime the Fuel System:
- Fill the new fuel filter with clean diesel fuel. This will help prime the system.
- Reconnect the fuel lines to the new filter and tighten the clamp securely.
-
Pump the Primer Pump:
- The 5.9 Cummins engine is equipped with a primer pump, usually located on the fuel filter housing.
- Pump the primer pump several times until resistance is felt. This will help to push fuel through the system.
-
Start the Engine:
- Once the fuel system is primed, attempt to start the engine.
- If the engine starts but runs rough or stalls, it may still have air in the system.
-
Bleed the Injectors:
- Locate the injector lines running from the fuel filter to the injectors.
- Loosen the injector line nuts at the injectors, one at a time.
- Have an assistant crank the engine (or use the starter) for a few seconds while you observe the fuel escaping from the loosened nuts.
- Tighten the nuts once fuel, free of air bubbles, flows from each line.
-
Check for Leaks:
- After bleeding all the injectors, check for any fuel leaks around the fuel filter and injector lines.
- Tighten any connections if necessary.
-
Test Drive:
- Start the engine and let it idle for a few minutes to ensure it runs smoothly.
- Take the vehicle for a test drive to ensure proper operation.
-
Final Inspection:
- Once back from the test drive, check again for any fuel leaks.
- Ensure the engine runs smoothly and without hesitation.
Conclusion:
Bleeding the injectors on a 5.9 Cummins is a straightforward process but requires attention to detail. Following these steps will help ensure the fuel system is free of air bubbles, allowing the engine to run smoothly and efficiently. If you encounter any difficulties or persistent issues, it's recommended to consult a professional mechanic for assistance.
Part 8 How to Clean Injectors on a 5.9 Cummins
Cleaning the injectors on a 5.9 Cummins is crucial for maintaining optimal engine performance and fuel efficiency. Over time, carbon deposits and contaminants can accumulate, affecting injector spray patterns and engine performance. Here's a step-by-step guide on how to clean the injectors:
Tools and Materials Needed:
- Injector cleaning kit
- Safety glasses and gloves
- Ratchet and socket set
- Clean rags
- Carburetor cleaner or injector cleaning solution
- Compressed air
Steps to Clean the Injectors:
-
Prepare the Vehicle:
- Park the vehicle on a flat surface and engage the parking brake.
- Allow the engine to cool down before proceeding.
-
Locate the Injectors:
- The injectors are usually located on the top or side of the engine. They are connected to the fuel rail.
-
Disconnect the Fuel Rail:
- Use a ratchet and socket to remove the bolts securing the fuel rail.
- Carefully disconnect the fuel rail from the injectors. Be prepared for some fuel spillage, so have a container to catch the fuel.
-
Remove the Injectors:
- Once the fuel rail is removed, the injectors can be accessed.
- Carefully disconnect the electrical connectors and fuel lines from each injector.
- Use the appropriate socket to remove the injector retaining bolts.
- Gently wiggle and pull the injectors out of the cylinder head.
-
Inspect the Injectors:
- Before cleaning, visually inspect each injector for signs of damage or clogging.
- Check for carbon buildup, debris, or any other contaminants.
-
Cleaning the Injectors:
- Attach the injector cleaning kit according to the manufacturer's instructions.
- Connect the cleaning kit to a compressed air source.
- Follow the instructions to run the cleaning solution through the injectors. This will help remove deposits and contaminants.
-
Manual Cleaning (Optional):
- If the injectors have stubborn deposits, you can manually clean them.
- Use a clean rag soaked in carburetor cleaner or injector cleaning solution to wipe the injector nozzles and ports.
- Be gentle to avoid damaging the injector components.
-
Reinstall the Injectors:
- Once cleaned, carefully reinstall the injectors back into the cylinder head.
- Make sure they are properly seated and secure the retaining bolts.
- Reconnect the fuel lines and electrical connectors to each injector.
-
Reconnect the Fuel Rail:
- Position the fuel rail back over the injectors.
- Tighten the bolts to secure the fuel rail in place.
-
Test Run:
- Start the engine and let it idle for a few minutes.
- Take the vehicle for a test drive to ensure smooth operation and improved performance.
Conclusion:
Cleaning the injectors on a 5.9 Cummins is a maintenance task that can improve engine performance and fuel efficiency. Following these steps will help ensure that the injectors are free of deposits and contaminants, allowing for optimal fuel delivery and combustion. If you encounter any issues during the cleaning process or if the injectors are severely clogged, it's recommended to seek professional assistance.
Part 9 How to Fix Leaking Injectors on a 5.9 Cummins
Leaking injectors on a 5.9 Cummins can lead to various issues such as poor fuel economy, rough idling, and potential engine damage. Here's a guide on how to fix leaking injectors:
Tools and Materials Needed:
- Safety glasses and gloves
- Ratchet and socket set
- Clean rags
- Replacement injector o-rings or seals
- Injector rebuild kit (optional)
- Carburetor cleaner or injector cleaning solution
- Compressed air
- Fuel injector puller (if needed)
Steps to Fix Leaking Injectors:
-
Diagnose the Issue:
- Before proceeding, it's essential to confirm that the injectors are indeed leaking.
- Look for signs of fuel leakage around the injectors, such as wet spots or fuel odors.
- Perform a visual inspection of the injector seals and o-rings for wear or damage.
-
Prepare the Vehicle:
- Park the vehicle on a flat surface and engage the parking brake.
- Allow the engine to cool down before starting the repair.
-
Locate the Leaking Injectors:
- The injectors are typically located on the top or side of the engine, connected to the fuel rail.
- Identify the leaking injectors based on visual inspection and fuel traces.
-
Disconnect the Fuel Rail:
- Use a ratchet and socket to remove the bolts securing the fuel rail.
- Carefully disconnect the fuel rail from the injectors. Be prepared for some fuel spillage, so have a container to catch the fuel.
-
Remove the Injectors:
- If necessary, use a fuel injector puller to remove the injectors from the cylinder head.
- Carefully disconnect the electrical connectors and fuel lines from each injector.
- Use the appropriate socket to remove the injector retaining bolts.
- Gently wiggle and pull the injectors out of the cylinder head.
-
Replace the O-rings or Seals:
- Inspect the injector o-rings or seals for wear, cracks, or damage.
- Replace the o-rings or seals with new ones from a replacement injector rebuild kit.
- Lubricate the new o-rings or seals with a bit of clean engine oil before installation.
-
Clean the Injector Ports:
- Use a clean rag soaked in carburetor cleaner or injector cleaning solution to clean the injector ports in the cylinder head.
- Ensure the ports are free of debris or old seal remnants.
-
Reinstall the Injectors:
- Carefully reinstall the injectors back into the cylinder head.
- Make sure they are properly seated and secure the retaining bolts.
- Reconnect the fuel lines and electrical connectors to each injector.
-
Reconnect the Fuel Rail:
- Position the fuel rail back over the injectors.
- Tighten the bolts to secure the fuel rail in place.
-
Test Run:
- Start the engine and check for any signs of leaks.
- Monitor the engine for smooth operation and proper fuel delivery.
- Take the vehicle for a test drive to ensure the issue is resolved.
Conclusion:
Fixing leaking injectors on a 5.9 Cummins is essential for maintaining optimal engine performance and preventing fuel-related issues. By following these steps, you can effectively address leaking injector problems and restore proper fuel delivery to the engine. If you encounter any difficulties during the repair process or if the leaks persist, it's recommended to seek professional assistance.
Part 10 How to Test 5.9 Cummins Injectors
Testing the injectors on a 5.9 Cummins engine is essential for maintaining optimal performance and diagnosing any potential issues. Here's a step-by-step guide on how to properly test the injectors:
-
Prepare the Tools:
- Fuel pressure gauge
- Fuel pressure regulator
- Multimeter
- Injector testing kit
-
Locate the Injectors:
- The injectors are typically located on the top side of the engine, attached to the fuel rail.
-
Disconnect the Injectors:
- Start by disconnecting the electrical connectors from each injector.
-
Check Fuel Pressure:
- Connect the fuel pressure gauge to the fuel rail to ensure proper fuel pressure. Refer to the manufacturer's specifications for the correct pressure range.
-
Check Injector Resistance:
- Use a multimeter to measure the resistance of each injector. The resistance should be within the manufacturer's specifications. If an injector shows significantly higher or lower resistance, it may be faulty.
-
Perform Injector Balance Test:
- This test involves measuring the amount of fuel each injector delivers.
- Attach the injector testing kit to each injector one at a time.
- Crank the engine and observe the amount of fuel sprayed by each injector.
- Compare the spray patterns and volumes. All injectors should spray evenly and have similar volumes.
- If one injector sprays less fuel or has a different pattern, it may be faulty.
-
Check for Leaks:
- Inspect each injector for any signs of leaks, such as fuel residue around the injector body.
- Leaking injectors can cause poor engine performance and should be replaced.
-
Consult Professional Help:
- If you're unsure about the results of the tests or if the injectors show signs of malfunction, it's best to consult with a professional mechanic or diesel technician.
-
Replace Faulty Injectors:
- If any injectors fail the tests or show signs of malfunction, they should be replaced with new ones to ensure proper engine function.
-
Reconnect Injectors:
- Once testing and replacements are complete, reconnect the electrical connectors to each injector.
Regularly testing the injectors on your 5.9 Cummins engine can help prevent issues and ensure optimal performance. If you encounter persistent problems with your injectors, it's best to seek professional assistance for a thorough diagnosis and repair.
Part 11 What Are the Best Injectors for a 5.9 Cummins?
When considering the best injectors for your 5.9 Cummins engine, it's essential to weigh various factors to ensure optimal performance and longevity. Here are some considerations:
-
Genuine OEM Injectors: Genuine OEM (Original Equipment Manufacturer) injectors are made by the same manufacturer as the original parts in your Cummins engine. They are designed to exact specifications and are typically the most expensive option. While they offer peace of mind regarding compatibility and quality, they can be costly.
-
Aftermarket Injectors: Aftermarket injectors are designed by third-party manufacturers and are often more affordable than OEM options. These injectors can vary widely in quality, so it's crucial to choose a reputable brand known for producing reliable aftermarket parts.
-
Remanufactured Injectors: Remanufactured injectors are used injectors that have been cleaned, inspected, and rebuilt to meet or exceed OEM specifications. They are a cost-effective option that can offer similar performance to new injectors. Many reputable remanufacturers offer warranties on their products, providing added peace of mind.
-
Performance Injectors: If you're looking to increase horsepower and torque, performance injectors could be an option. These injectors are designed to deliver more fuel to the engine, enhancing performance. However, they may require additional modifications to your engine and should be used with caution to prevent damage.
-
Fuel Efficiency and Emissions: Consider how different injectors impact fuel efficiency and emissions. Some aftermarket or performance injectors may sacrifice fuel economy for increased power, while others are designed to improve both power and efficiency.
-
User Reviews and Recommendations: It's always a good idea to research user reviews and seek recommendations from fellow 5.9 Cummins owners or diesel mechanics. They can provide valuable insights into which injectors have performed well in real-world applications.
Ultimately, the best injectors for your 5.9 Cummins will depend on your specific needs, budget, and desired performance. It's essential to balance cost with quality and choose injectors that offer reliable performance and longevity for your engine.
Part 12 When to Replace 5.9 Cummins Injectors
5.9 Cummins injectors are critical components of the engine's fuel delivery system. Over time, they can wear out or develop issues that affect engine performance. Here are some signs that it may be time to replace your 5.9 Cummins injectors:
-
Hard Starting: If your 5.9 Cummins engine is difficult to start, especially when cold, it could be a sign of injector wear. Faulty injectors may not deliver fuel properly, causing hard starting issues.
-
Poor Fuel Economy: Worn injectors can result in poor fuel atomization, leading to decreased fuel efficiency. If you notice a significant drop in fuel economy, it might be due to failing injectors.
-
Engine Misfires: Injectors that are not functioning correctly can cause engine misfires. Misfires can result in rough idling, hesitation, and reduced power.
-
Black Smoke from Exhaust: Excessive black smoke coming from the exhaust pipe can indicate an injector problem. This could be due to an injector stuck in the open position, allowing too much fuel into the combustion chamber.
-
Engine Knocking or Pinging: Injectors that are not delivering fuel evenly or at the right time can cause knocking or pinging noises from the engine. This is a sign of inefficient combustion.
-
Check Engine Light: If the check engine light illuminates on your dashboard, it could be due to injector-related issues. A diagnostic scan can identify specific injector codes and help pinpoint the problem.
-
Loss of Power: Failing injectors can lead to a loss of engine power and performance. If you notice a decrease in acceleration or overall power, it may be time to inspect the injectors.
-
Excessive Exhaust Smoke: Apart from black smoke, other types of exhaust smoke such as white or blue smoke can also indicate injector problems. White smoke might indicate coolant entering the combustion chamber due to a faulty injector, while blue smoke could signal oil burning, also caused by injector issues.
-
Fuel Odor: A noticeable fuel odor, especially around the engine bay, could indicate leaking injectors. This is a serious issue that should be addressed promptly.
It's essential to monitor these signs and symptoms and have your 5.9 Cummins engine inspected by a qualified mechanic if you experience any of them. Ignoring injector problems can lead to more significant engine damage and costly repairs. Regular maintenance and timely replacement of injectors can help keep your 5.9 Cummins engine running smoothly and efficiently.
Part 13 How to Rebuild 5.9 Common Rail Injectors
Rebuilding 5.9 Cummins common rail injectors can be a cost-effective way to restore their performance and extend their lifespan. Here are the general steps involved in rebuilding these injectors:
-
Gather Necessary Tools and Parts: Before starting, gather all the tools and parts you'll need for the job. This typically includes injector rebuild kits, socket and wrench set, injector puller, cleaner, tester, and safety gear such as gloves and goggles.
-
Remove Injectors: Begin by removing the 5.9 Cummins common rail injectors from the engine. This usually involves disconnecting the fuel lines, electrical connectors, and any mounting bolts. Use an injector puller tool to carefully remove the injectors from the cylinder head.
-
Disassemble Injectors: Once the injectors are removed, disassemble them carefully. Pay close attention to the order and orientation of the components as you take them apart. This includes O-rings, seals, pintle caps, and other small parts.
-
Clean Components: Thoroughly clean all the injector components using a suitable injector cleaner and a soft brush. Remove any carbon deposits, dirt, or grime from the injector body, nozzles, and other parts. Ensure all passages are clear of debris.
-
Inspect for Damage: Inspect each injector component for signs of wear, damage, or corrosion. Check the nozzles for wear patterns, the pintle for scoring, and the injector body for cracks or leaks. Replace any damaged or worn parts with new ones from the rebuild kit.
-
Replace Seals and O-Rings: Install new seals, O-rings, and pintle caps from the rebuild kit onto the injector. Apply a small amount of clean engine oil to lubricate the O-rings before installation.
-
Reassemble Injectors: Carefully reassemble the injectors in the reverse order of disassembly. Ensure all components are correctly aligned and seated. Torque the injector components to the manufacturer's specifications.
-
Test Injectors: Before reinstalling the injectors, it's crucial to test them to ensure they are functioning correctly. Use an injector tester to check for proper spray pattern, fuel delivery, and leakage. This step helps identify any issues before reinstallation.
-
Install Injectors: Once the injectors pass the testing phase, reinstall them into the engine. Follow the manufacturer's torque specifications and tightening sequence. Reconnect fuel lines, electrical connectors, and any other components removed during disassembly.
-
Final Checks and Start-up: Double-check all connections and components to ensure everything is secure. Start the engine and monitor for any unusual noises, leaks, or issues. Allow the engine to warm up and check for smooth operation.
Rebuilding 5.9 Cummins common rail injectors requires precision and attention to detail. If you're not comfortable with this process, it's recommended to have a professional mechanic or diesel technician perform the rebuild. Properly rebuilt injectors can restore engine performance, improve fuel efficiency, and extend the life of your 5.9 Cummins engine.


